
 AMA
AMA
EvoLogics AMA / User guide
Installation
EvoLogics AMA software is a utility to perform data transmissions between S2C underwater acoustic modems for testing purposes.
It offers several simple tools to exchange short instant messages or larger data volumes between devices, visualize the parameters of the acoustic connection and change some device settings.
This document is a short guide on installing and using AMA software.
For details on setting up and testing your S2C device after purchase, please refer to the Quick Start Guide supplied with the modem. It contains general recommendations on handling, operating and storing S2C devices.
A separate document - the S2C Reference Guide - is a comprehensive features overview and describes the full command set to operate S2C-series devices.
AMA installation
System Requirements
- Operating system: Windows 7 and higher or Debian-based Linux systems
- Interfaces: Ethernet or RS-232 (RS-422) serial interfaces that support full-duplex (bidirectional) communication
Installation process
Windows
The Setup Wizard will guide you through the installation steps.
- Run the AMA_xxx.exe installation file you received from EvoLogics.
Read and accept the License Agreement and click Next to proceed. - The software will be installed to the default destination folder.
Click Browse to select another destination.
When ready, click Install to proceed.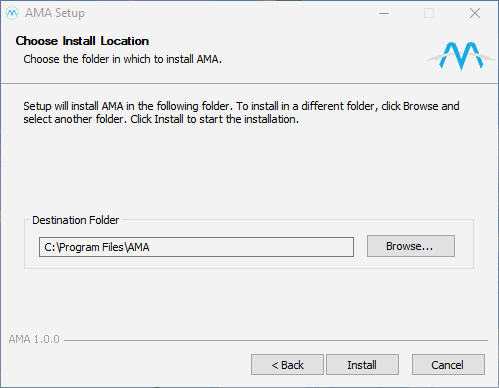
Figure 1: AMA Installation
- Wait for the installation to complete.
Check Run AMA if you want to launch the software and click Finish to close the Setup Wizard.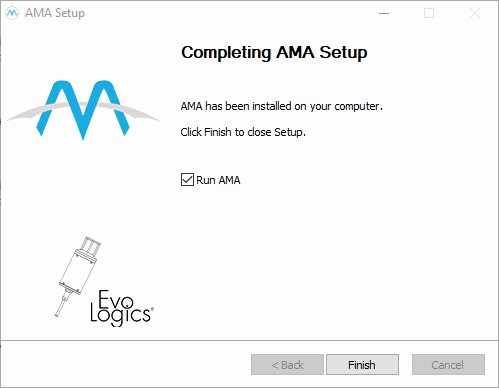
Figure 2: AMA Installation
Debian Linux
- Install AMA_xxx_amd64.deb:
sudo dpkg -i AMA_xxx_amd64.deb
sudo apt-get -f install
Uninstalling AMA
Launching AMA
Windows
- Run AMA from the Start menu or use the Desktop icon.
Alternatively, launch AMA.exe directly from its installation folder. - If a Windows Security Alert appears, click on Allow Access for erl.exe - AMA needs this component to run.
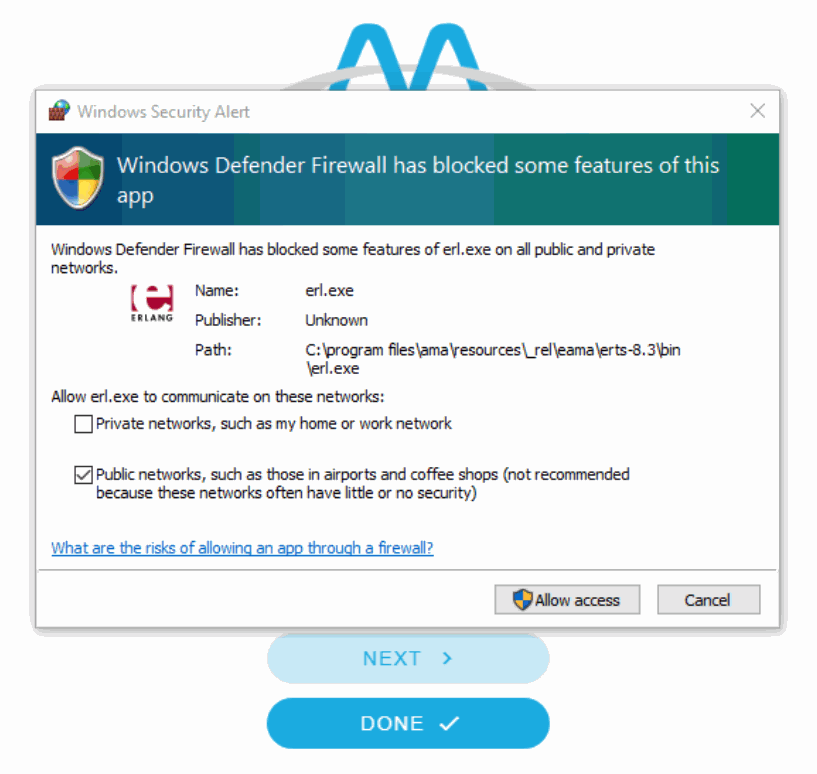
Figure 3: Windows defender alert
Linux
Use the system Menu or launch AMA from the terminal:
- Type ama and press Enter.
Get started with AMA
AMA basic concepts
You need to connect at least two underwater acoustic modems to AMA to establish an acoustic connection and exchange data between them using the software.
Devices interfaced with the PC AMA is running on are called Locally connected devices.
Remote devices are modems not interfaced with the PC/AMA you are working with. These modems can be communicated with over the acoustic channel only.
AMA stores the configuration of connected devices, the activity history and transferred data as a Session. You can create several different Sessions (for example, for different groups of devices) and easily switch between them when needed.
A Database is a group of Sessions and can be exported to a file and imported back to AMA when needed.
Connecting the PC and S2C modem
To work with AMA, you have to connect two modems to the PC you installed AMA on and configure the connections between each modem and AMA.
Follow the steps below to establish a connection between the PC and your EvoLogics S2C modem:
- Check the Quick Start Guide supplied with your S2C device and follow the instructions on connecting it to a power supply.
For devices with a built-in battery, make sure it is sufficiently charged. - Connect your S2C device to the PC over serial or Ethernet interface.
- Turn on your S2C device, as described in its Quick Start Guide. Turn on the PC.
Configure the connection between modem and AMA
Adding a new Session
Open AMA, as described in previous section 2.4. AMA will open the Sessions screen.
- Press + to create a new Session.
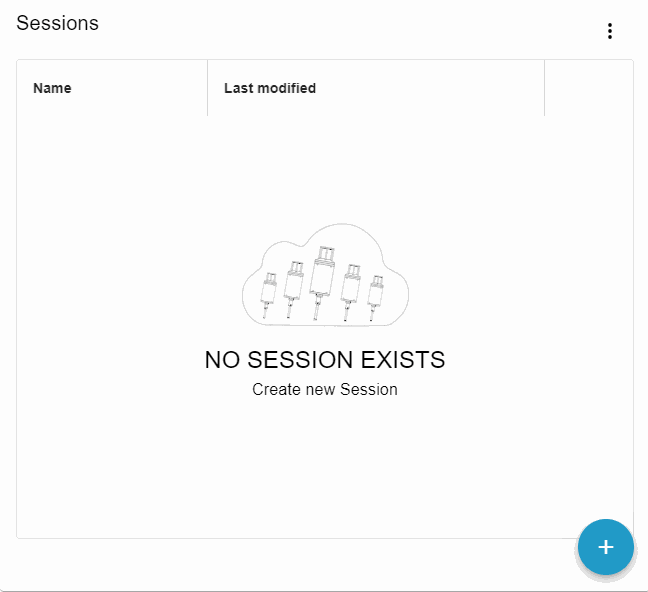
Figure 4: Create a new Session
- Enter the Session name and press Add.
AMA will now create and open the Session.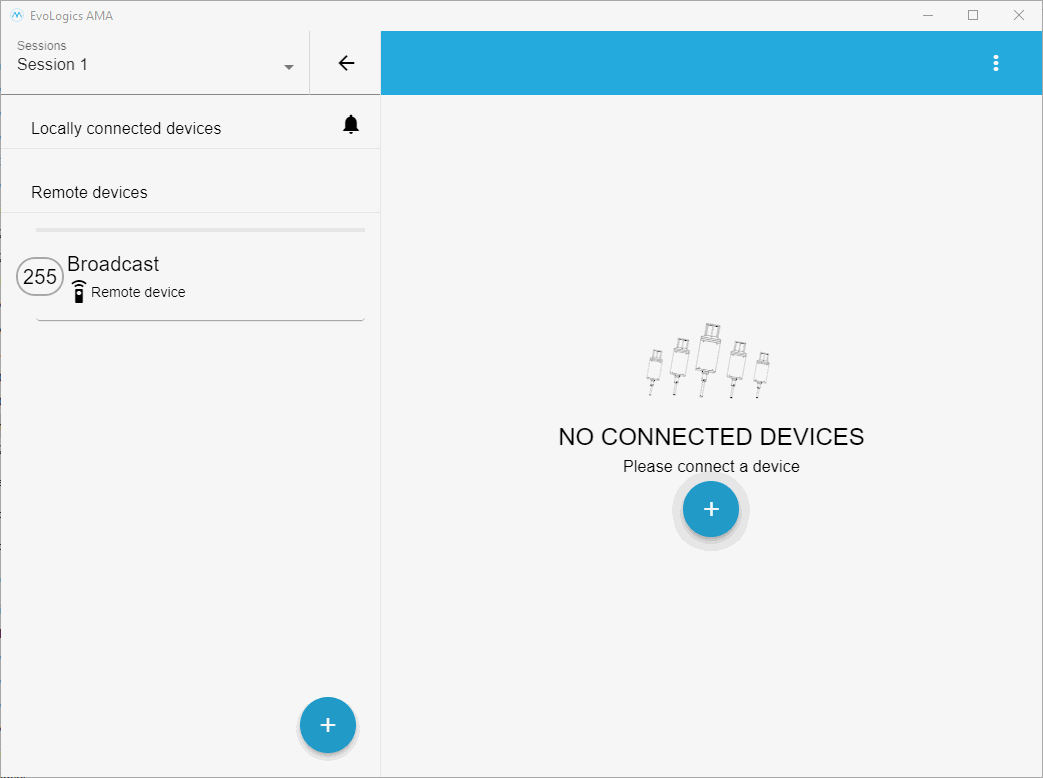
Figure 5: New Session
Adding Local Connected devices
Important: Make sure to check the Factory Certificates of your modems for information on their interfaces and interface parameters. You will need this information to configure the connection.
Next, proceed to add local connected Devices to AMA.
- Press + to add a new Device. The Connect Device dialog will pop up.
- Configure the connection to a local device in the Connected tab:
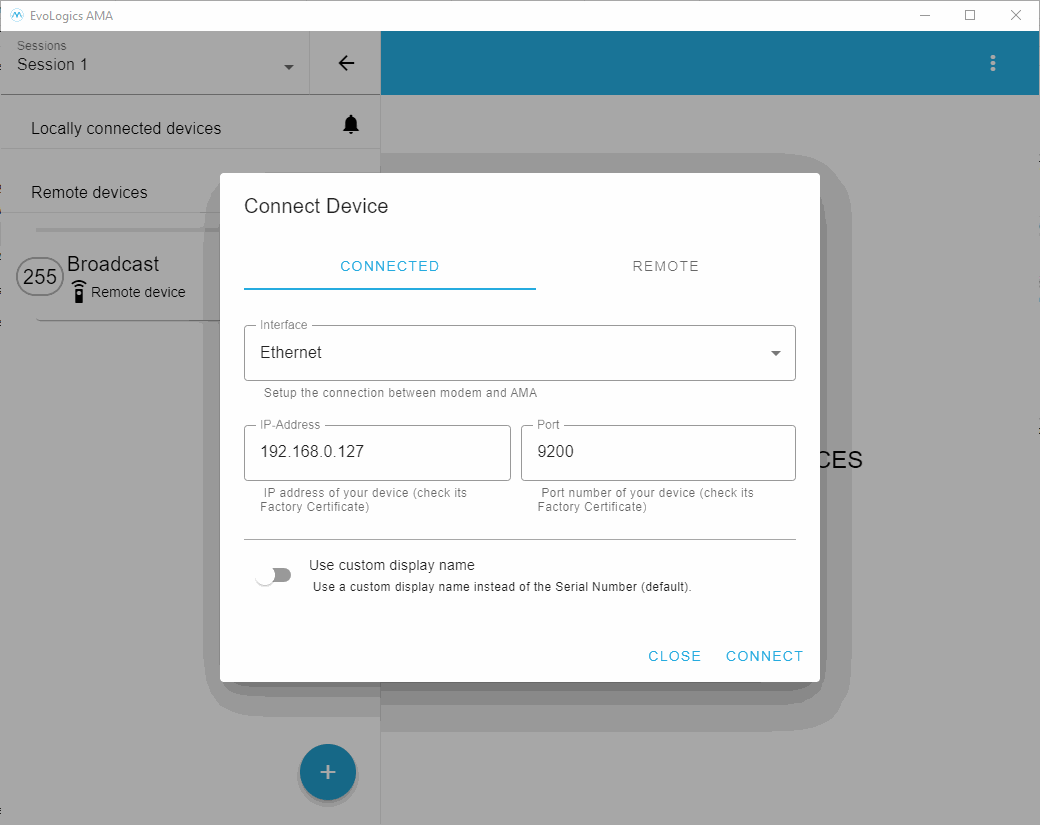
Figure 6: Connect Device dialog: local connected device tab
Setup the interface parameters:
- Ethernet
- If your S2C device is connected to the PC over Ethernet, select Ethernet in the Interface drop-down.
- Enter the IP address and port number of your S2C device into the corresponding IP-Address and Port fields. The default IP address and port number of your device are listed in its Factory Certificate.
- If your S2C device is connected to the PC over Ethernet, select Ethernet in the Interface drop-down.
- Serial
- If your S2C device is connected to the PC over serial interface, select Serial in the Interface drop-down.
- Select the serial Port and Baudrate.
The default serial connection settings of your S2C device are listed in its Factory Certificate.
Toggle Advanced serial settings to view or modify the Data bits, Parity and Stop bits parameters.

- If your S2C device is connected to the PC over serial interface, select Serial in the Interface drop-down.
Figure 7: Connect Device: Serial connection
- Name your device - the name is a label for the device to be displayed in AMA:
- By default, modem name is its Serial Number. Toggle the Use custom display name switch to enter a custom label for the modem.
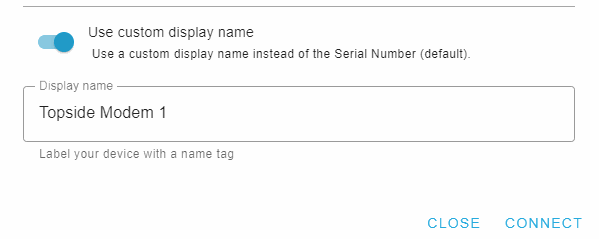
- By default, modem name is its Serial Number. Toggle the Use custom display name switch to enter a custom label for the modem.
Figure 8: Custom name
When ready, click Connect to establish a connection to the device.
Repeat for all modems you want to add to AMA as Local devices.
Adding Remote devices
You can add Remote Devices to AMA. These devices can be communicated with over the acoustic channel. A Remote Device should be connected to a data source (for example, another PC). You can install an instance of AMA on that PC as well.
- Press + to add a new Device. The Connect Device dialog will pop up.
- Configure the acoustic connection to a remote device in the Remote tab:
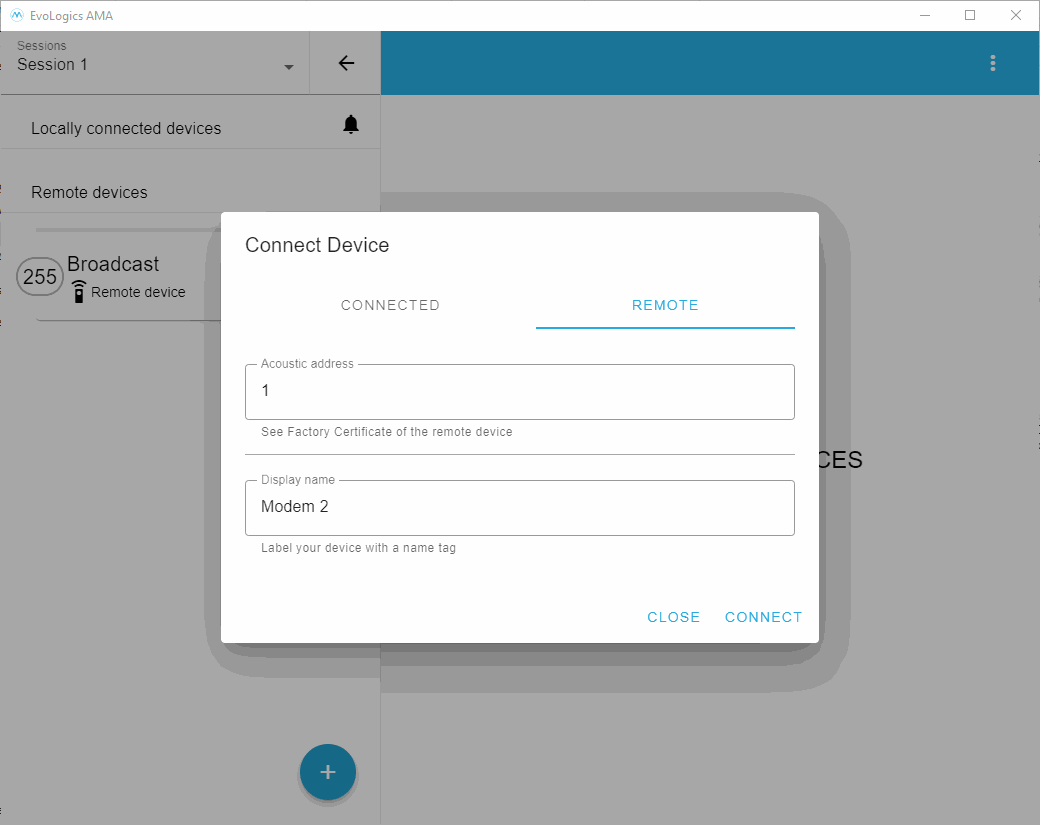
Figure 9: Connect Remote Device
- Enter the Acoustic address of the device into the corresponding field.
The default address is listed in the modem's Factory Certificate under Local Address. - Enter a display name for the remote device.
When ready, click Connect to establish a connection to over the acoustic channel.
Repeat for all modems you want to add to AMA as Remote devices.
Please note: address 255 is the broadcast address - messages sent to this address are received by all devices in the acoustic network. A Remote Device with address 255 is automatically added to AMA for broadcasting.
Using AMA
Main Screen Overview
The main screen of AMA resembles a typical messenger interface to exchange text and files.
This data exchange allows to test the acoustic link between the modems.
The panel on the left allows to manage Sessions and Devices.
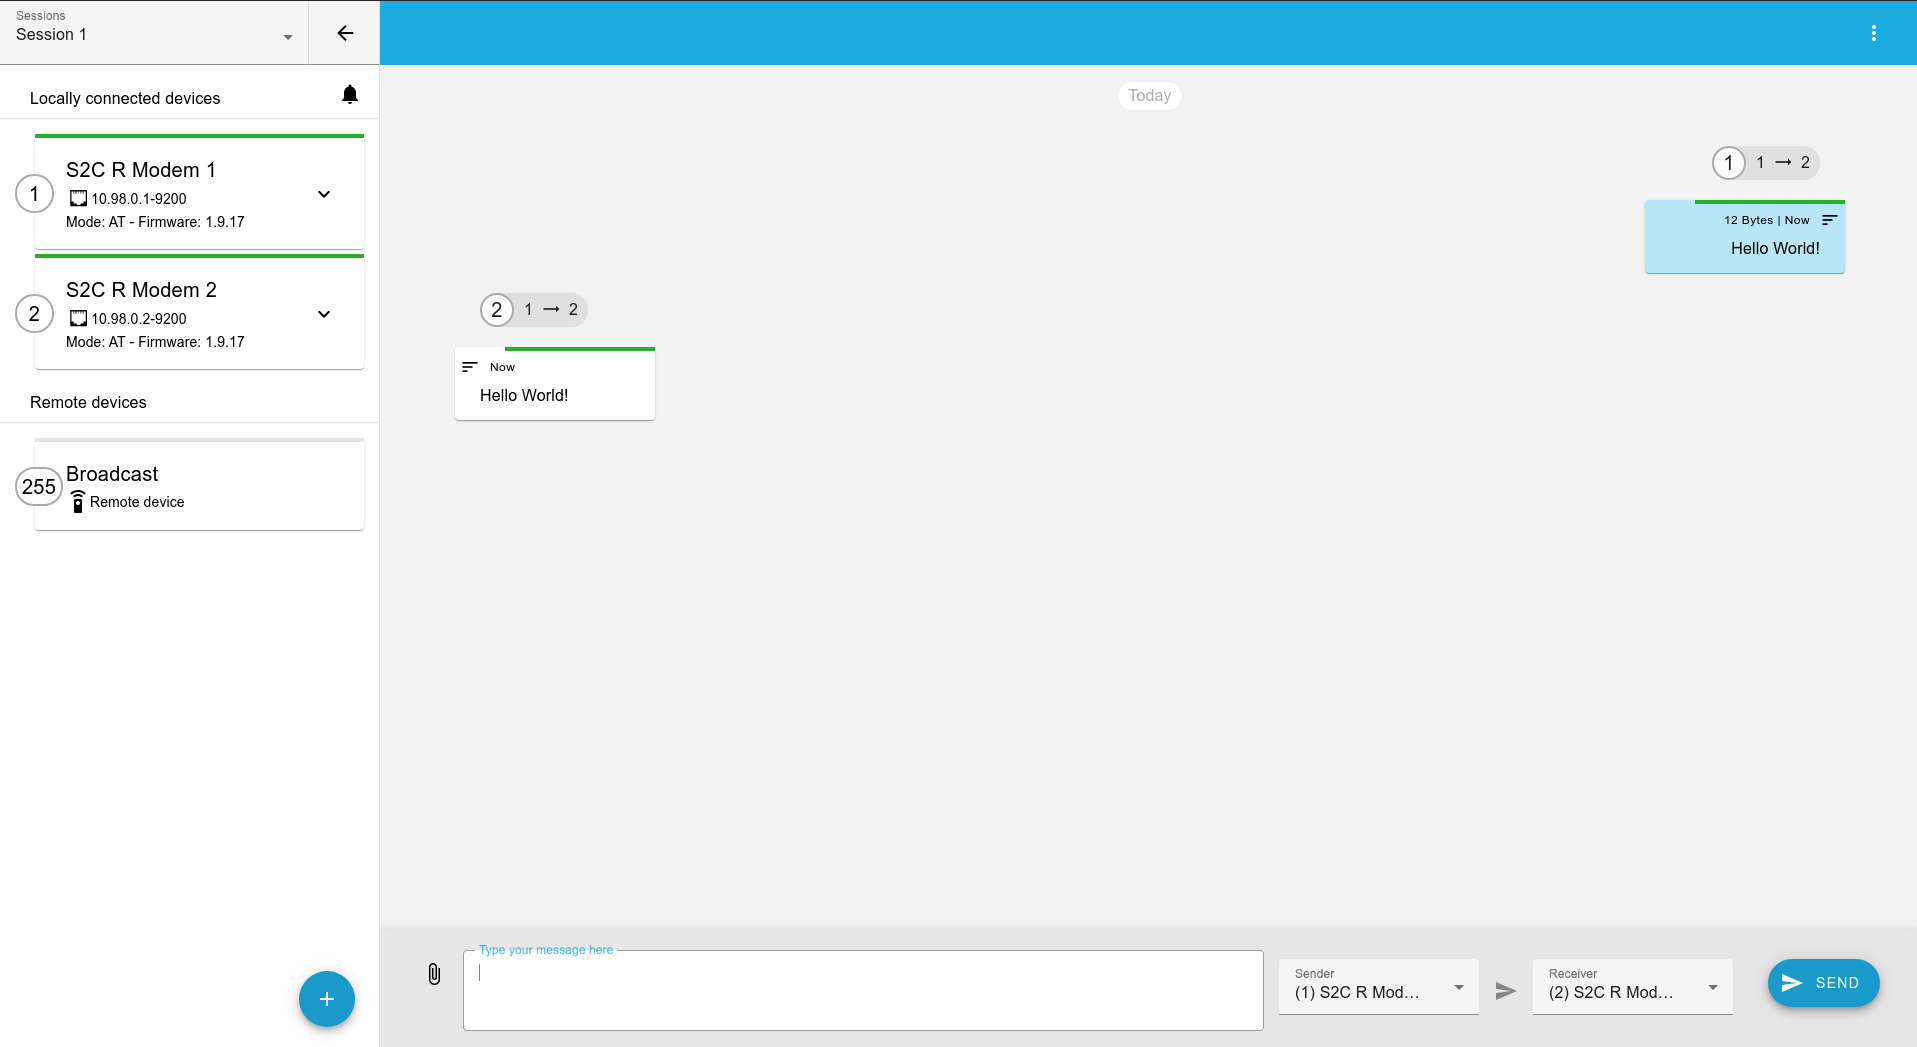 |
Figure 10: AMA Main screen
Quick Start: send messages and files
To send a message or file, simply:
- Type a message or select a file

- Select the Sender modem from the drop down list of Devices
- Select the Receiver from the drop down list of Devices
- Click Send to start the acoustic transmission.
Please note: To use the messenger, you must add at least 2 devices to AMA.
Jump to section 5 for more information on the Messenger and transmission details.
Messenger
The messenger allows to perform simple acoustic connection tests.
Type a message or select a file and send it over the acoustic channel to another S2C modem.
To use the messenger, you must add at least 2 devices to AMA.
 |
Figure 11: AMA messenger
To send text:
- Type your message
- Select the Sender from the list of the Local connected devices
- Select the Receiver from the list of devices.
This can be either a Local connected device, interfaced with the same instance of AMA, or a Remote device you added to AMA for acoustic communication.
Select Broadcast from the Receiver drop down to send the message to all devices. - Click on Send to transmit the message from the Sender to the Receiver. The modems will establish an acoustic connection for the data transfer.
To send a file:
- Click on the Attach file icon
 and browse for the file you want to transmit.
 - Repeat the steps above: select the Sender, the Receiver, and click Send.
The message or file you sent will be displayed on the Messenger screen:
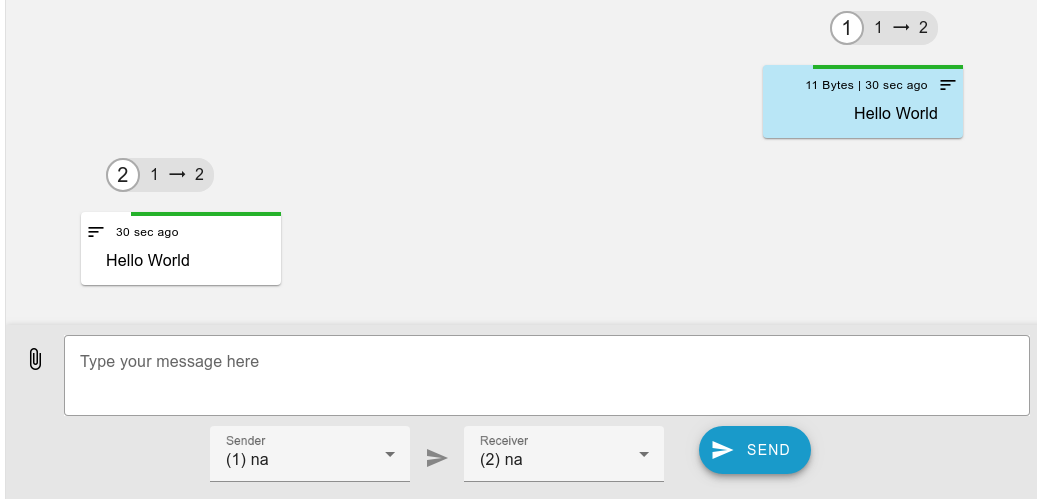 |
Figure 12: AMA Messenger
Here, you can see the acoustic address of the Sender, the time elapsed since the transmission, and, if you sent a file, its size.
Transmission Details
Hover over the Details
![]() icon to see the stats of the acoustic transmission:
icon to see the stats of the acoustic transmission:
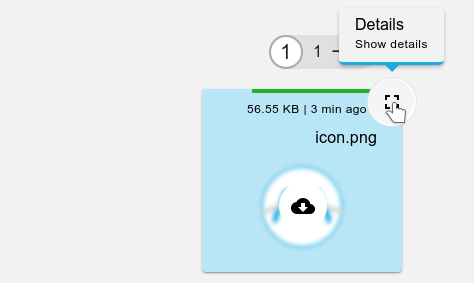 |
Figure 13: AMA Messenger: transmission details
A new window with appear with detailed information on the transmission, including the Bitrate and Distance charts:
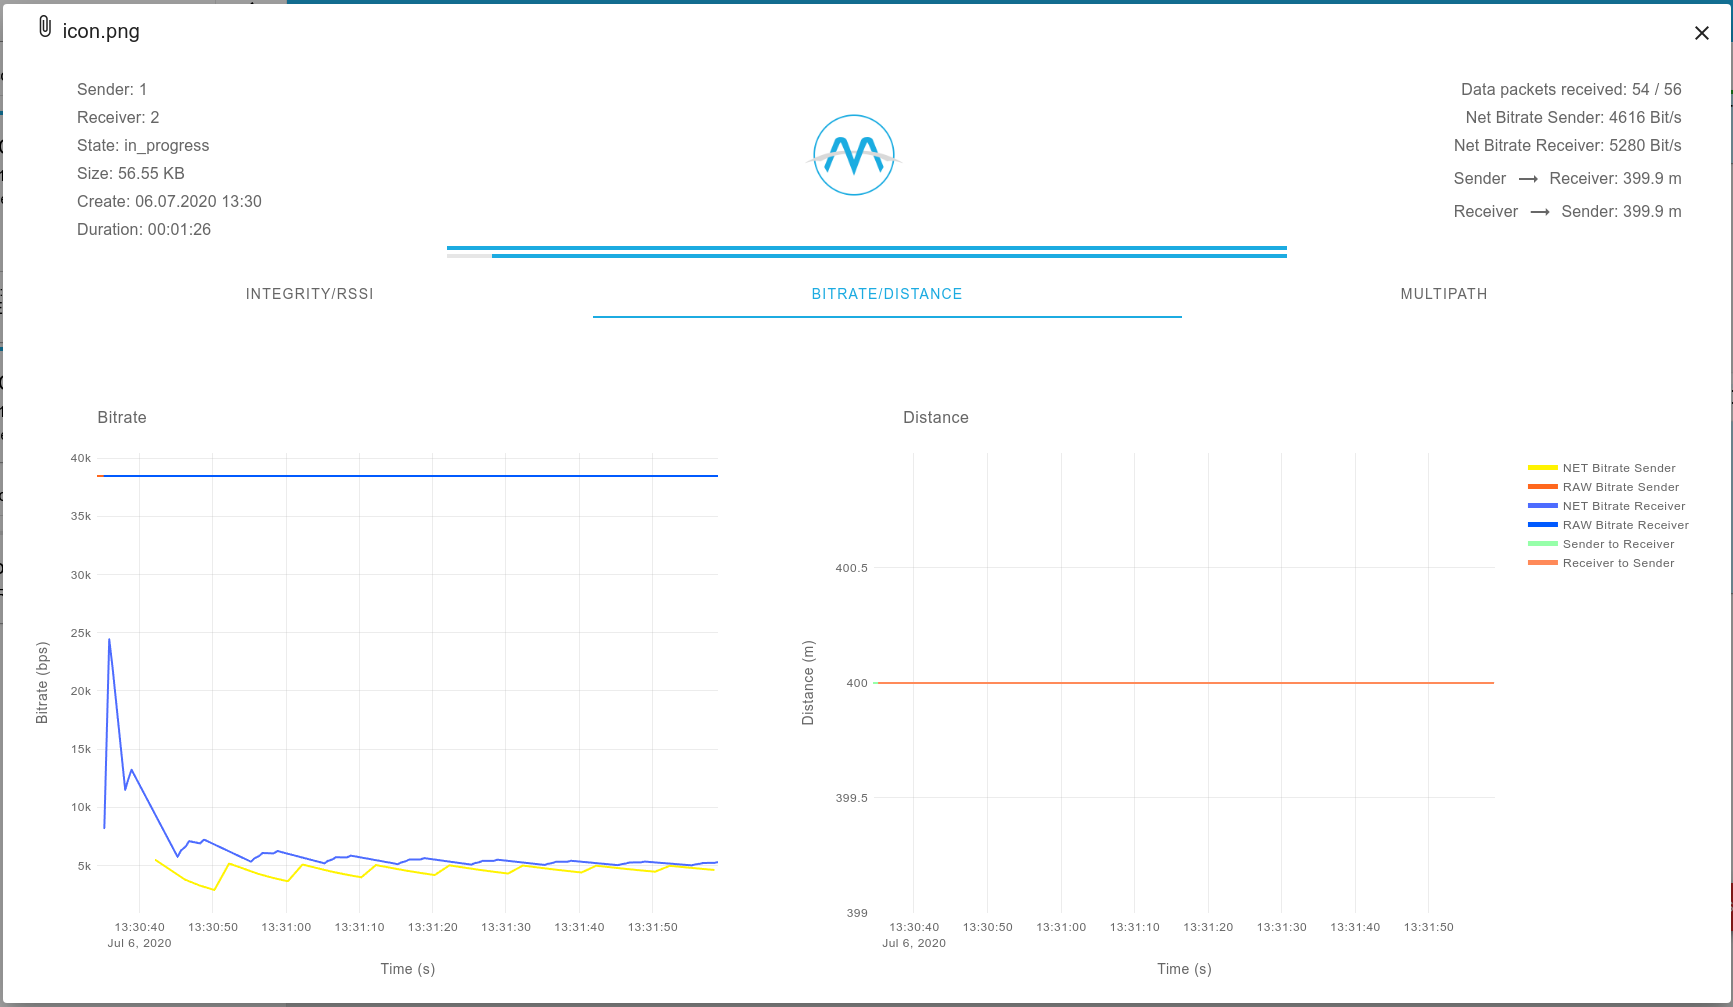 |
Figure 14: AMA Messenger: transmission details
You can configure the plot colors in AMA settings (11).
Sessions and Devices
The Sessions and Devices panel lists all Local connected devices and Remote devices, added to the current session.
Use the arrow control and collapse the panel to maximize the Chat screen, if needed:
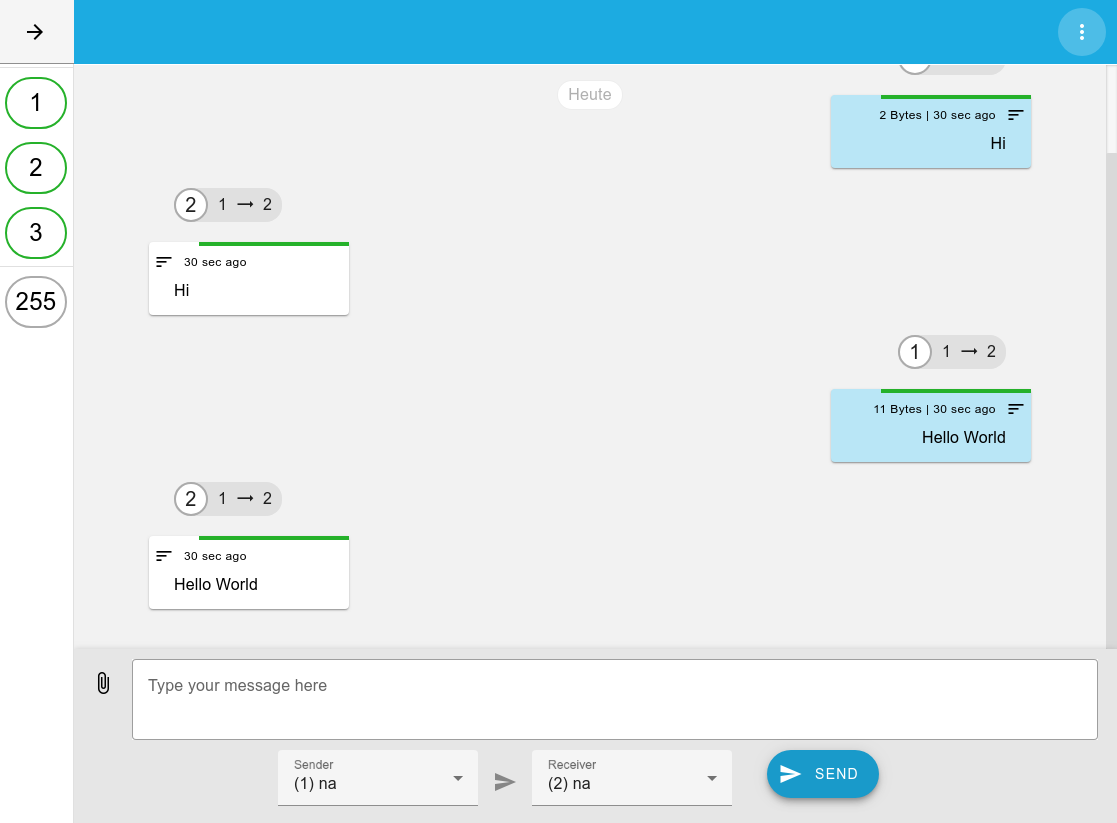 |
Figure 15: AMA Main screen: Sessions collapsed
Sessions
The Session selector drop-down allows to switch between sessions and close the current one:
 |
Figure 16: Sessions menu
Devices
The panel lists all devices in the current session:
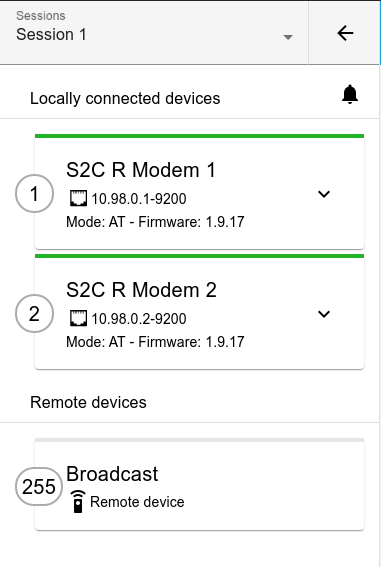 Figure 17: Devices |
- Each device is represented by its card. It displays the Device name, parameters of the connection between the device and AMA, as well as information on modem firmware.
- The address badge

displays the Acoustic address of the modem and helps to identify it when the panel is collapsed.
A Remote Device with address 255 is automatically added to AMA for broadcasting. Its display name is always Broadcast, and messages sent to this remote device are sent to all devices in the acoustic network. - All device cards, except the Broadcast card, can be expanded for more actions and options available for this device.
For Local connected devices interfaced with AMA, you can open the Device Logs
![]() window to view the logs of internal communication between AMA and the modems. Read more about Device Logs in section 7.
window to view the logs of internal communication between AMA and the modems. Read more about Device Logs in section 7.
Local Connected devices options
Expand a corresponding modem's card for more options and actions available for Local devices:
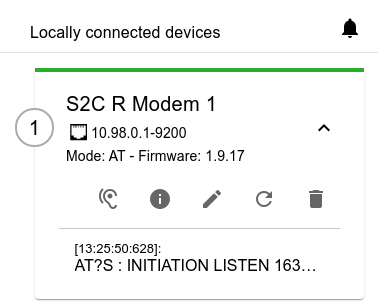 Figure 18: Local Devices - more options |
Here, you can:
- View the last log activity for the device. It will be displayed at the bottom of the card.
More information about device logs is available in section 7. - Open Noise Recorder
 . The noise recorder allows to record the noise RMS and analog input noise of the modem. See more in section 8.
 - View Device information

.
Here, information on firmware, command set, serial number, and several device settings are displayed.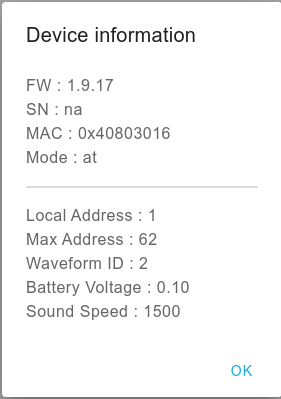
Figure 19: Local Devices - device information - Edit Device Settings

.
Here, you can modify some device settings: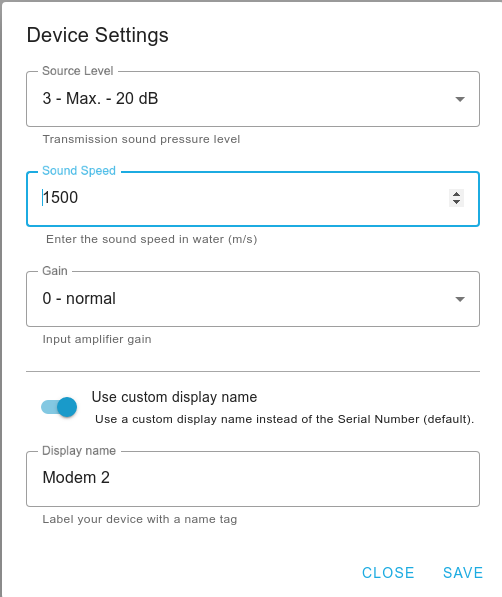
Figure 20: Local Devices - device settings- Edit the Display name of the modem that you previously setup during connection configuration.
- Select the Source level of the modem. This setting is only available after a connection between AMA and the modem was established.
The maximum transmission sound pressure level is listed in the Factory Certificate of the modem. Source level settings correspond to the levels:
0 - Maximum; 1 - Max. - 6 dB; 2 - Max. - 12 dB; 3 - Max. - 20 dB
Please note: when performing a short test in-air, use the Source level 3 setting. - Edit the Sound Speed setting of the modem. This setting is only available after a connection between AMA and the modem was established. This parameter is the sound speed in the transmission medium (water), used in internal computations.
- Edit the Gain setting of the modem. This setting is only available after a connection between AMA and the modem was established.
This parameter corresponds to the input amplifier gain of the modem. The low gain setting is recommended for short-distance communication or for short-distance testing of the device:
0 - Normal gain, corresponds to high sensitivity; 1 - Low gain, corresponds to -20dB reduced sensitivity. Recommended for short distances or testing (with AMA).
- Edit the Display name of the modem that you previously setup during connection configuration.
- Reboot the device

. This will restart the device firmware.
- Delete the device

. This will delete the device from the current AMA session.
Remote devices options
Expand a corresponding modem's card for more options and actions available for Remote devices:
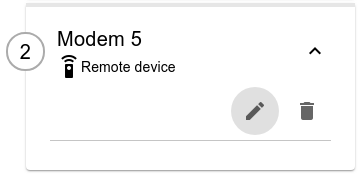 |
Figure 21: Remote Devices - more options
Here, you can:
- Edit Device Settings
 .
.
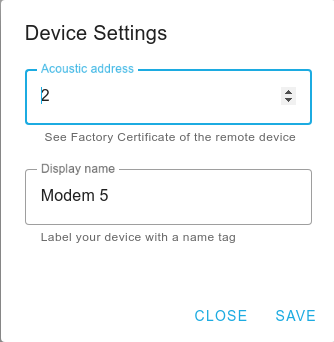 Figure 22: Local Devices - device settings |
- Edit the Display name of the modem that you previously setup during connection configuration.
- Edit the Acoustic address of the Remote device
- Edit the Display name of the modem that you previously setup during connection configuration.
- Delete the device

. This will delete the device from the current AMA session.
Session menu
You can click on the Menu icon ![]()
to open the Session Menu.
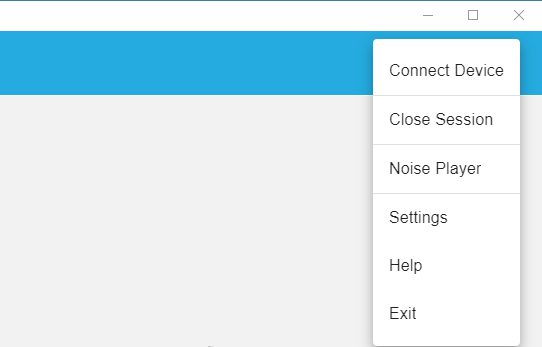 |
Figure 23: AMA Session Menu
Here, you can:
Device Logs
In Device Logs, you can see the logs of internal communication between AMA and Local connected devices.
- Open logs in for the current session with the corresponding icon

.
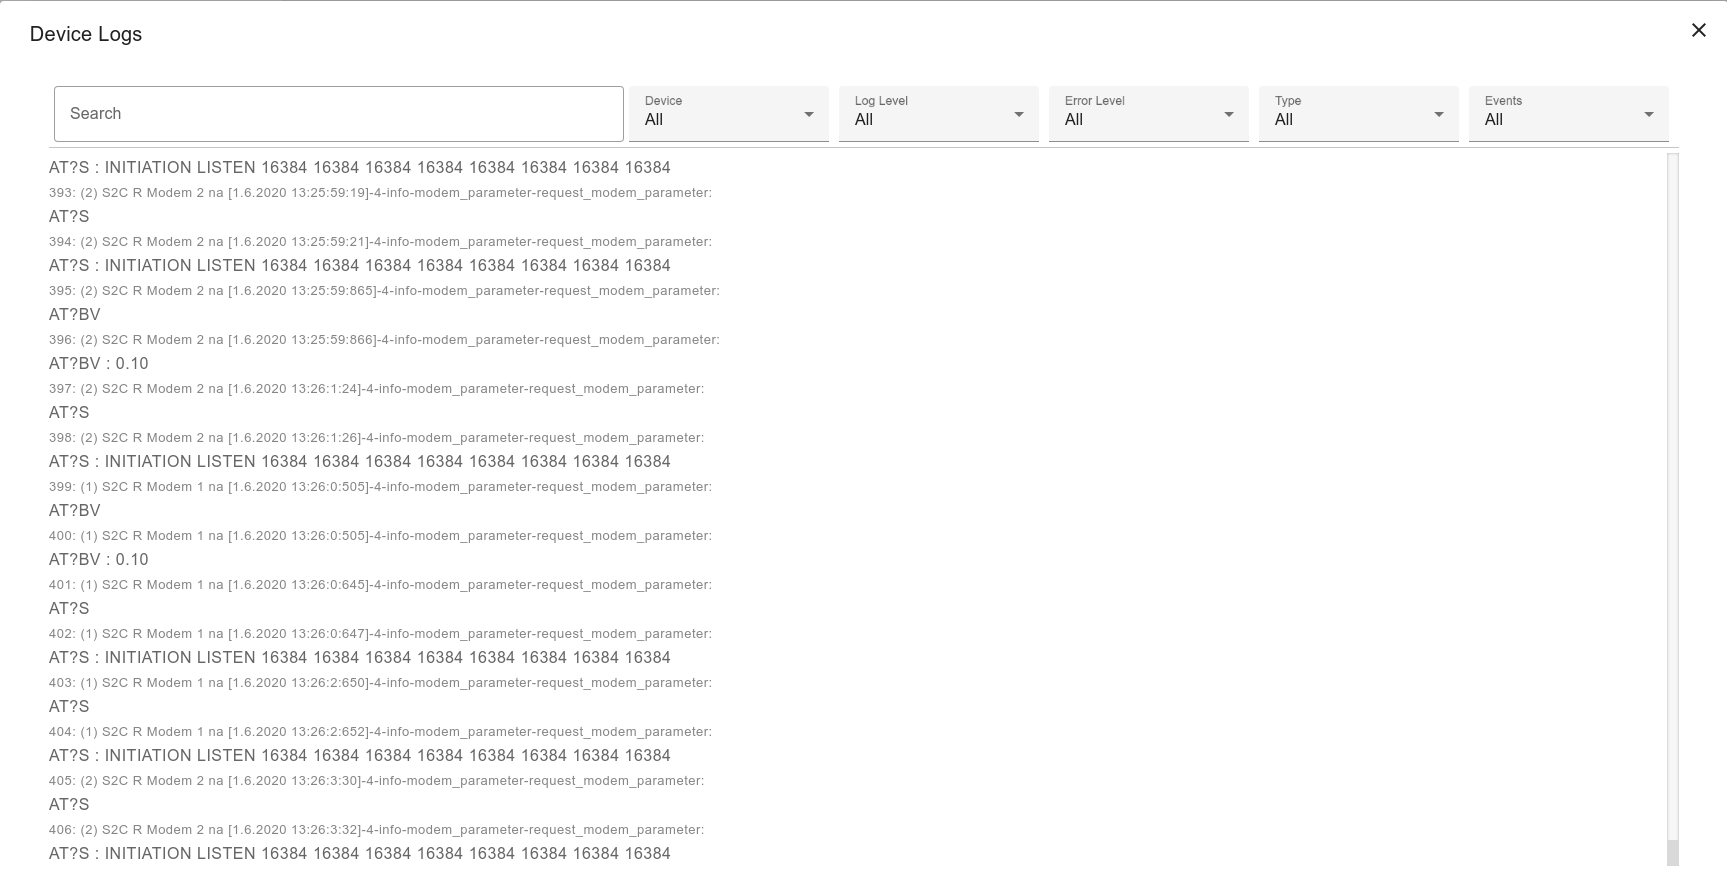 |
Figure 24: Device Logs
These include AT commands and requests that AMA sends to connected modems to check modem status, its parameters, to transmit data, and notifications from the modems on incoming data, responses to status requests, error notifications etc.
The information on AT commands that control operation of S2C modems can be found in the S2C Reference Guide, supplied with the modem.
You can use the Search panel to look for a particular message, and filter the logs by different criteria with the drop-down lists of filters to the right.
Noise recorder
With the Noise Recorder, you can record and save noise RMS and a sample of raw analog input noise for a Local connected device.
Please note: Noise Recording is compatible with modem firmware versions 2.0.9 and up. You can check the Factory Certificate or Device information (6.0.2) for the firmware version of your device.
- To open the Recorder, click on the corresponding icon in the Device card

.
Noise RMS
- To record noise RMS, go to the Noise RMS tab and press Record.
- When finished, press Download to save the recording into a file.
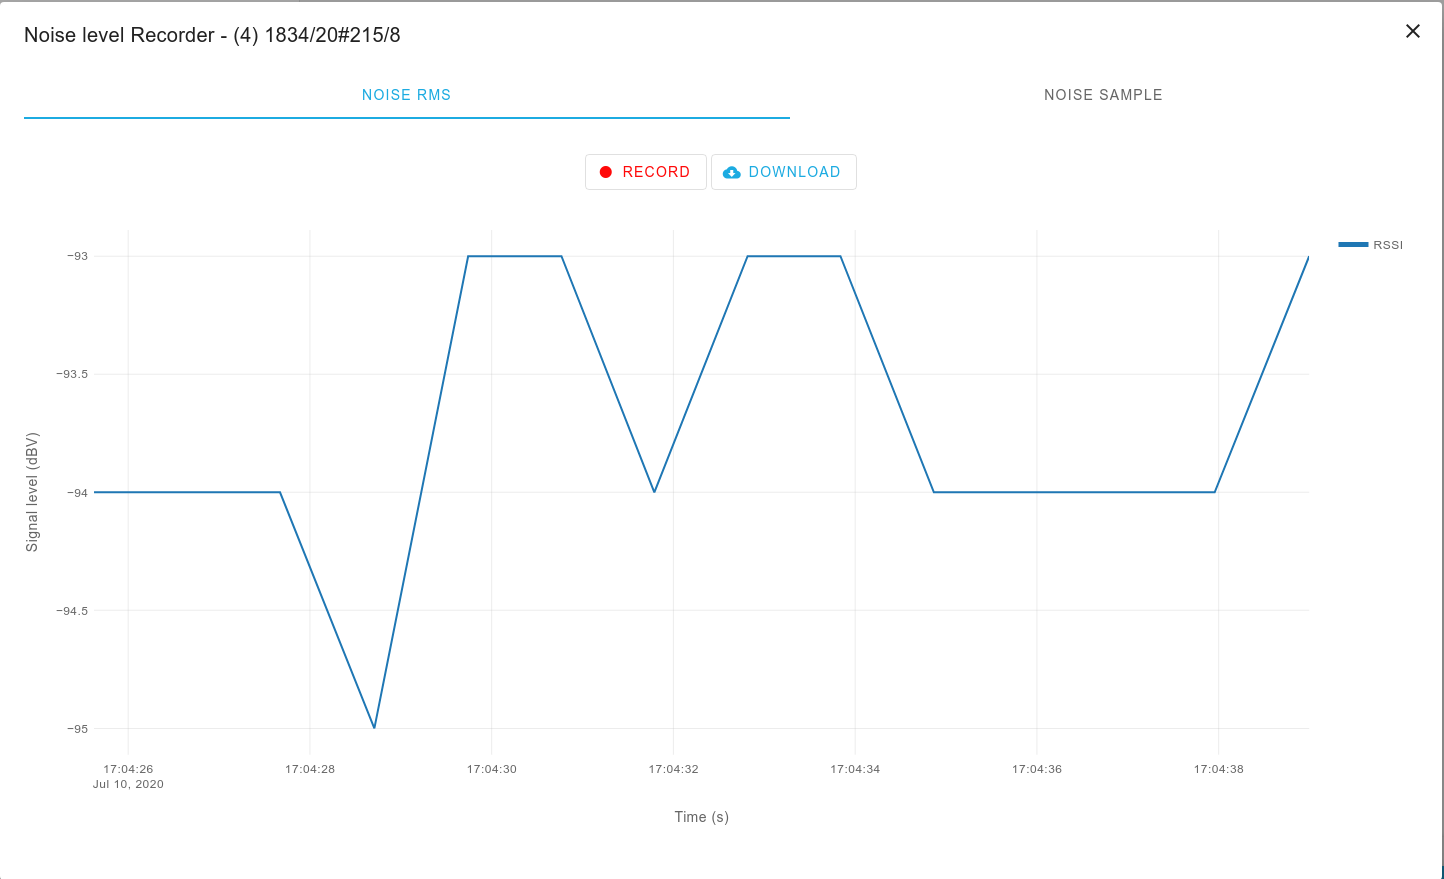 |
Figure 25: Noise Recorder: Noise RMS
Noise sample
- To record a sample of analog input noise of the modem, go to the Noise Sample tab and press Record.
- When finished, press Download to save the recording into a file.
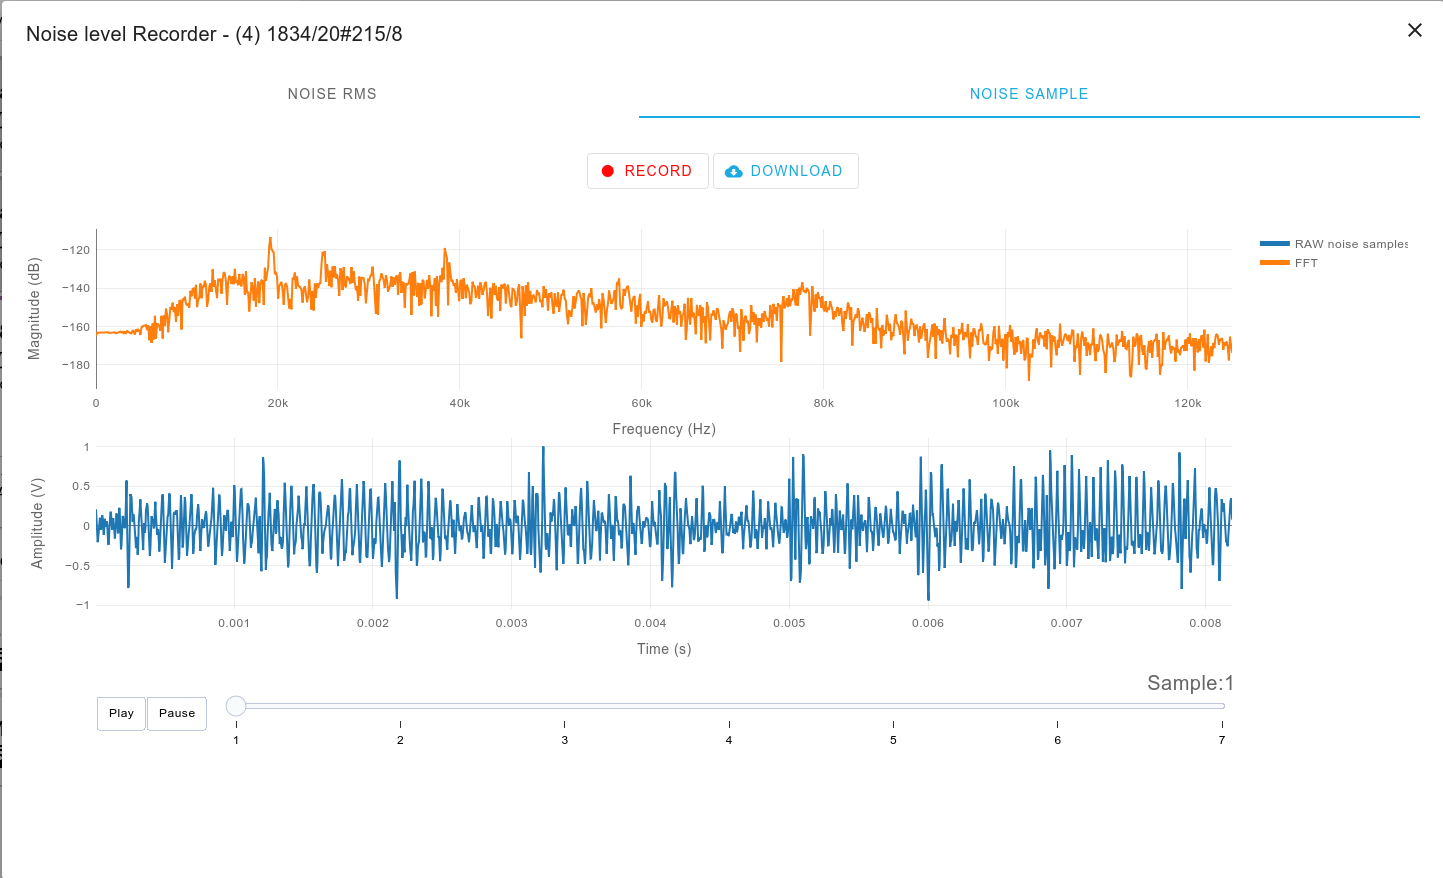 |
Figure 26: Noise Recorder: Noise Sample
Noise Player
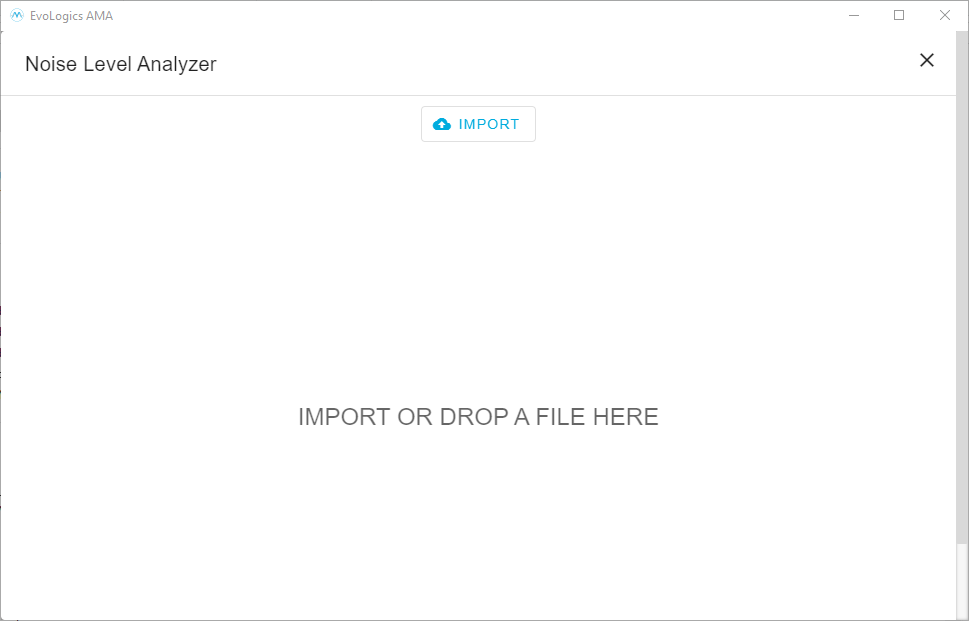
The Noise player allows to open a previously recorded noise file.
- To open the Noise player, go to the AMA Menu from the Sessions screen

or the Messenger screen

.
- Click on Import file and browse for the recording or simply drag and drop the file into AMA.
 |
You can click on the Menu icon ![]() in the Sessions screen to open the Main Menu of the software.
in the Sessions screen to open the Main Menu of the software.
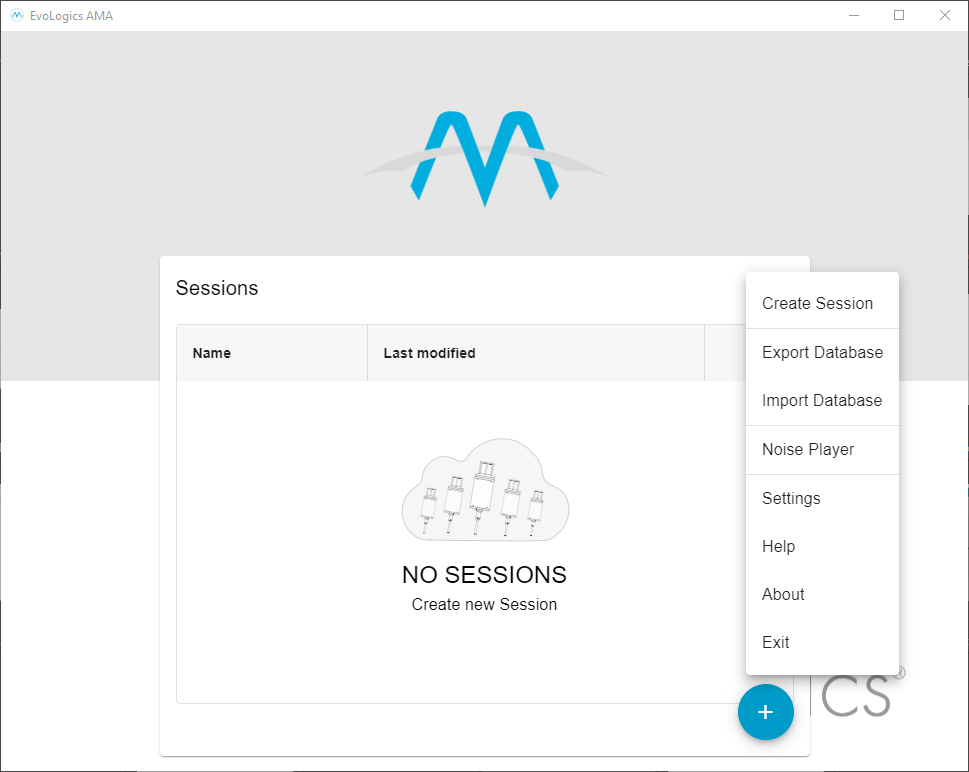 |
Figure 28: Main Menu
Here, you can:
AMA Settings
You can open AMA Settings from the Main menu on the Sessions screen or from the menu of an open session.
General settings
In the General tab, you can:
- Select the display language.
- Select between the Light and Dark color themes.
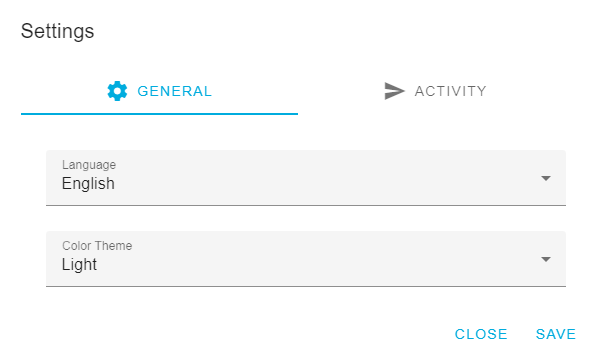 |
Figure 29: AMA Settings - General
Activity settings
In Activity tab, you can:
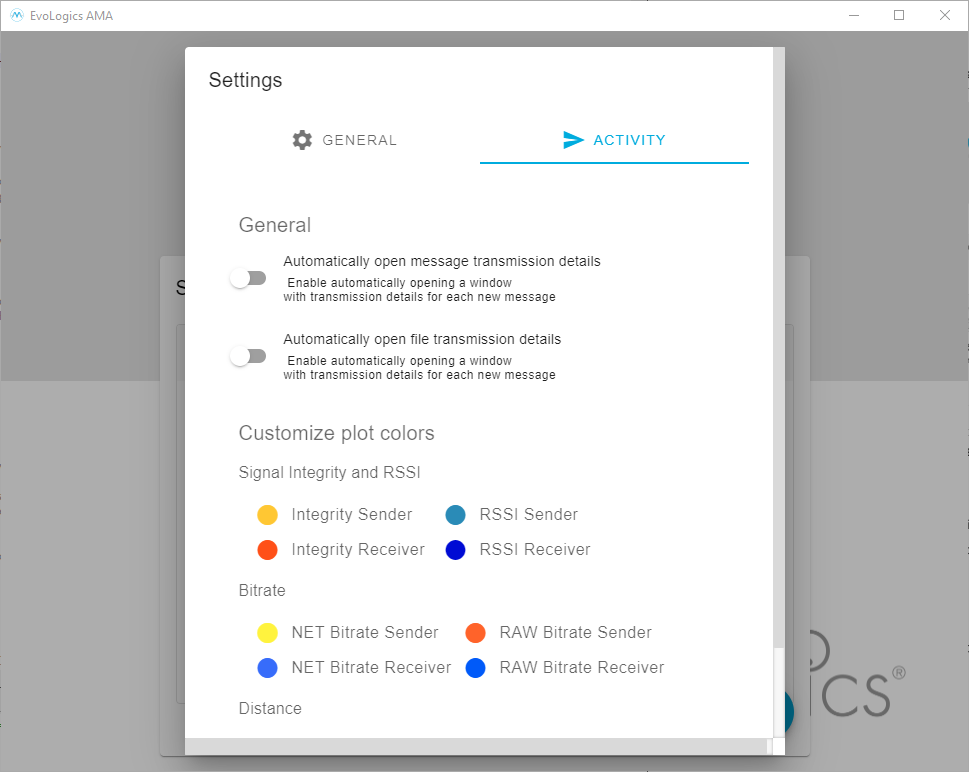 |
- Configure message and file transmission details - toggle the corresponding switch to automatically open transmission stats (5.0.1).
- Customize plot colors of the transmission statistics charts.